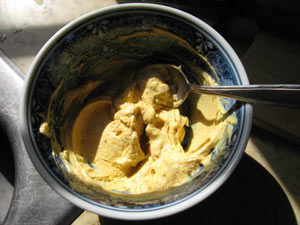
Roasted veggies once a day . . .

Fresh vegetables are everywhere right now. Summer squash, cabbage, green beans, peppers sweet and hot, broccoli, tomatoes, beets, new potatoes, garlic, onions, corn, cukes, turnips . . . it’s happy high harvest season on the island and at your local produce stand. And what to do with all this bounty? Roast ’em.

Singing the praises of roasting veggies

  1. It’s a simple technique.
  2. It can be applied to dozens of different kinds of vegetables.
  3. You can do it in a toaster oven.
  4. It brings out the best in every vegetable. Delicious!
  5. It’s fast.
  6. It’s foolproof.
  7. Once you do it 3 or 4 times, it will become second nature for you.

The Process

  1. Prepare the particular vegetable by washing and drying (or shaking the water off of it), peeling if necessary, and chopping into fairly small pieces. (Don’t worry. There are lots of pictures to follow this explanation.)
  2. Put them in a pan and drizzle with a GOOD extra virgin olive oil. Dust with salt and pepper.
  3. Swirl them around in the pan to spread out the olive oil and coat the veggie pieces better.
  4. Put in toaster oven (or regular oven if you have a bigger pan and family) and roast at 425º for about 20 to 25 minutes. After about 15 minutes, remove the pan and stir and flip the veggies around a bit and put it back in until they’re “done.”

Some illustrations

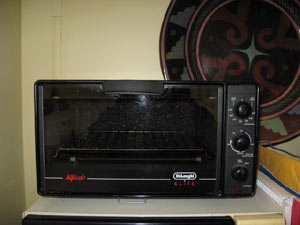
Your basic tool besides a sharp knife or two and a cutting board is an oven. I live alone for now and use my trusty toaster oven. toasterOvenforwebIt’s pretty good sized and the pan that came with it, which you will see over and over, is about 9″ by 10″.
Then you need the three essential condiments:

  1. Extra Virgin Olive Oil. I don’t care what brand (though Spectrum and Trader Joe’s have some great ones). I buy what’s on sale before I run out and have the new bottle in the cupboard. My favorite is First Cold Press and organic. Whatever you buy for this should be a deep, flavorful green. It’s expensive compared to other oils, yes, but it’s a great value and it will make the quality of your food soar for a small investment. A little goes a long way.
  2. Salt . . . sea salt or kosher salt. These are real. The common, pourable “table salt” has other chemicals in it. Again, a little more expensive, but important for quality and health.
  3. Pepper . . . freshly ground. As in, you should have a pepper mill. I bought mine in the Dansk store in Copenhagen in 1970. It still works smoothly and gracefully. Always buy the best quality tool you can afford. 
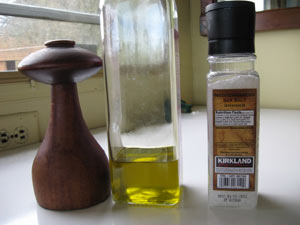
    Roasted Veggie Essential Condiments

I’ve told you before that there are dozens of online movies and illustrations to show you how to clean an onion or mushroom and I don’t want to duplicate that. I want to get you thinking about preparing food in a “global” way rather than thinking that you need to follow a recipe.

Roasting veggies is a technique that can be applied in a bajillion ways. Here are some examples to whet your imagination.

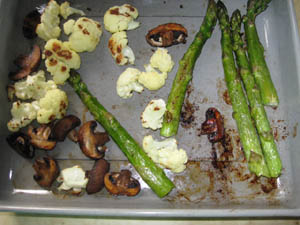
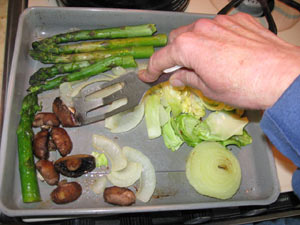
In Spring, mid-April, asparagus is in season. Crimini mushrooms (baby portabellas), onions and cabbage are always available. Notice the olive oil drizzled on top.Asparagus+ veggies in spring
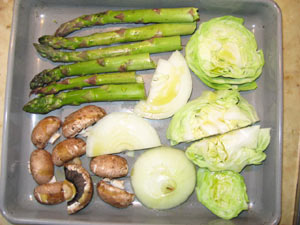
I stuck this pan into the oven set at 425º.

After about 15 minutes I took it out. Notice that there is steam coming off of it (fresh veggies have a high water content). The cabbage has begun to turn brown around the edges and the mushrooms have shrunk a lot.Asparagus+ at 15 minutes
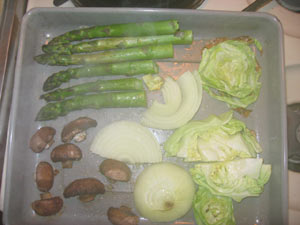
Then I stirred and flipped it a bit, and put the pan back into the oven.

Stirring-the-Asparagus+

About 10 minutes later I had roasted veggies.Asparagus+ finished roasted veggies
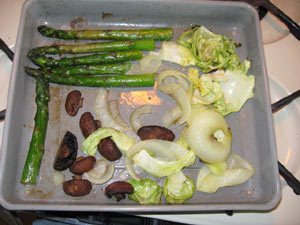
Here are more before and after pictures . . .

Asparagus+criminis+cauliflower beforeAsparagus+Crimini+Cauliflower Beforeand after.
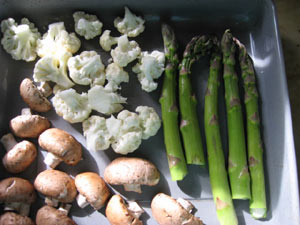

Asparagus+crimini+cauliflower after roasting
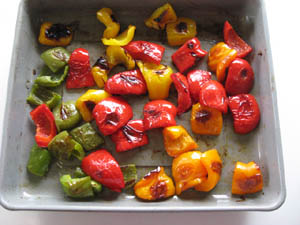
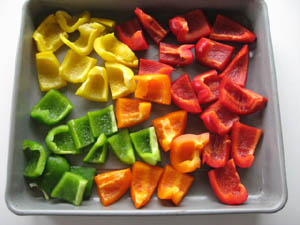
In May peppers were on sale for a dollar each. Beforeroast peppers beforeand after.roast peppers after
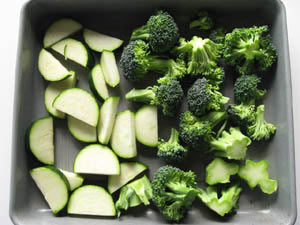
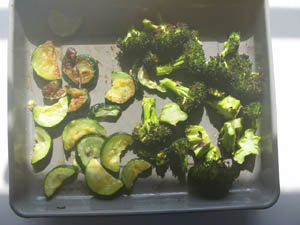
Here are zucchini and broccoli.Zucc+-brocc beforestill steaming . . .Zucc+-brocc after

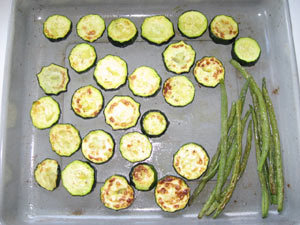
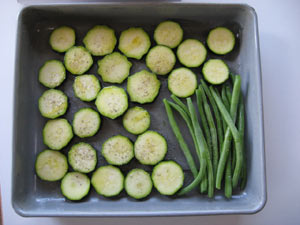
Zucchini and green beans. Note the pepper. I was in a peppery mood that day.Zucc+green beans-beforeZucc+green beans-after
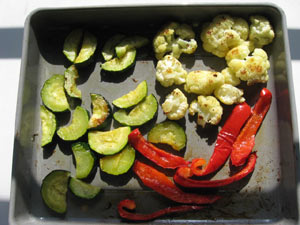
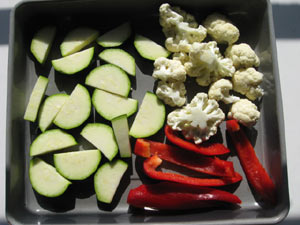
One more combo: zucchini, cauliflower and red pepper.zucch,-caul,-red-pepper beforezucch,-caul,-red-pepper-after
Enough already!

. . . with the pictures. I have successfully roasted everything you see above plus carrots, eggplant, tomatoes, potatoes, turnips, sweet potatoes, black radish, and some I’m sure I’ve forgotten.

I started doing this only about a dozen years ago with potatoes, garlic and fresh rosemary and I fell in love with them. Because I’m basically a lazy cook, I eat roasted veggies 5 to 7 days a week as one of my meals.

If you don’t like canned or “boiled” vegetables, it’s a sign of your good taste. Now try these. I’m serious! If you’re still skeptical, start with the potatoes with big fresh garlic chunks or whole cloves and fresh rosemary if you have it. To die for . . .

I have to go. A gorgeous purple cauliflower is calling my name. She asked me to hook her up with the purple pole beans she met in the fridge. I’m throwing in a couple carrots to chaperone. ARE THESE THREE NOT GORGEOUS? purple-caul-web
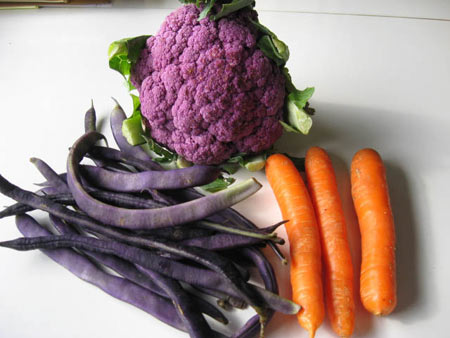
In food, as in all things, beauty counts.

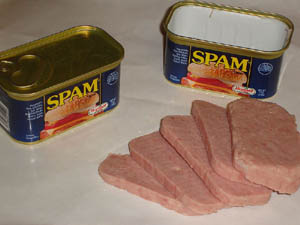
SPAM® more expensive than sirloin steak?

I read an interesting article the other day in the Statesman Journal about what American consumers are buying and not buying these days. House paint, plumbing repair parts and SPAM are among the things enjoying higher sales. “Hormel said sales of its meat-in-a-can continued to rise in the quarter, gaining in the low double digits.”

(cc) Matthew W. Jackson,

(cc)Matthew W. Jackson

I haven’t seen a can of SPAM in decades but today, just for the heck of it, I ventured into the interior of a local grocery to see what these great sales figures were about. The common belief is that this is an affordable “meat” in “these tough economic times.” It’s at least 10% more desirable than it was in the last fiscal quarter. Baloney and horse manure!

SPAM was offered in three sizes and one of them was on sale. Depending on the size package, today at the Port Hadlock, WA, QFC, you can buy SPAM BY THE POUND for:

  • $3.99
  • $6.16
  • $8.50

I escaped the interior and went back to my more familiar territory, the perimeter of the grocery store, and checked out the meat sales. (I almost always and only buy things on sale.) I found:

  • Petite Boneless Sirloin Steak, $3.99 a pound (on sale from its regular 6.99 a pound)
  • Boneless Pork Sirloin Chops, $3.99 a pound, buy one, get one free. That makes it close to $2 a pound if you choose your packages carefully.

Last week when I was walking by the meat counter I snagged some skinless, boneless chicken breasts, not organic but no hormones and vegetarian-fed, on sale for $1.99 a pound. I bought two packages and they’re in the freezer.

Let’s look again:
SPAM®:
$3.99
$6.16
$8.50

PER POUND

BONELESS SIRLOIN STEAK, SIRLOIN PORK CHOPS AND CHICKEN BREASTS:
$3.99
$2.00
$1.99

PER POUND

Okay, so let’s blow Myth #1 away. SPAM IS NOT CHEAP! IT’S NOT A “MORE AFFORDABLE” OPTION.

As for Myth #2, that it’s “convenient,” let’s look at the three cuts of meat I named. All of them can be quickly sauteed (like SPAM) just after you take them from the package. There aren’t even any bones. And all three make fabulous, quick, stir fries.”PREPARING”  SPAM IS NOT MORE CONVENIENT THAN PREPARING BONELESS REAL MEAT AND POULTRY UNLESS YOU EAT IT STRAIGHT OUT OF THE CAN.

Granted, you can’t store steak, pork chops or chicken breasts in the cupboard, but refrigeration is common in North America.

The zucchinis are coming . . . let them be cake

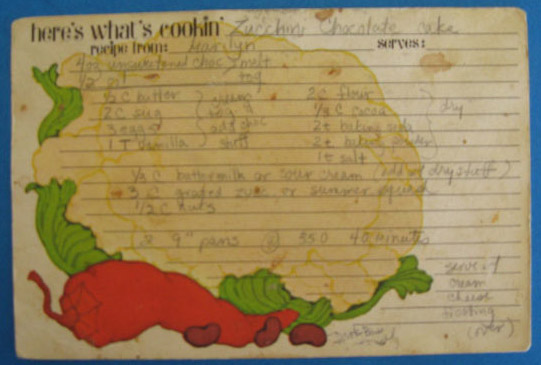
 I just finished typing up a recipe to send to the woman who’s in charge of programs for the new Snohomish Knitters Guild.  I’ll give my “Knitting, S.E.X., Chocolate, and a Couple of Math Skills” class/presentation at their October 13 meeting. I’m responsible for the hand-outs. They’re responsible for the chocolate. They can provide it in any form, but I send along a few of my favorite recipes in case anyone is inclined to bake. Today I added my friend Marilyn’s Chocolate Zucchini Cake to the mix. 

It occurred to me that since the zucchinis are starting their annual invasion of  the northern hemisphere, you might enjoy having this recipe as well. Australian and South African readers can bookmark this for the time when the invading hordes migrate their way.

An introduction to cakes

Cakes are easy to make. Recipes . . . not always easy to read. So I streamlined the process by thinking about it differently. I know this is a long explanation, but once you have the process down, you can make a cake about 3 times faster than if you laboriously follow most recipes.

You have basically 3, maybe 4, categories that go into a cake:

  1. A bowl of dry ingredients.
  2. A bowl with the fat (butter or oil), sugar and eggs that you “cream together.”
  3. A liquid of some sort that’s usually not much so you can hold it in a measuring cup. (I use a one or two cup liquid measuring cup.)
  4. You might have some solid things like nuts to add in at the end.

When I lived with “the guys” (a couple of husbands and a son, not all at the same time) I baked lots of cakes. This was my procedure:

  1. The night before I was going to bake I’d put the dry ingredients into a two to three quart bowl. For almost every cake, these are the same: flour+salt+baking soda and/or baking powder. A few other powders that might be included are unsweetened cocoa for a chocolate cake and some spices like cinnamon and cloves for a pumpkin or carrot cake. Take a fork or a whisk and gently stir them together so that everything is evenly distributed. Be gentle but thorough. Always put love into your food during the preparation.
  2. Put the butter in a slightly larger bowl so that it can come to room temperature overnight. I’ve already referred to the fact that I’m over-the-top in love with Challenge Unsalted Butter. That’s what I use. The recipe calls for oleo or margarine? I use my beloved butter. I store it in the freezer because unsalted butter is more perishable than salted. It needs a while to reach temperature and I leave it in its wrapping until it’s time to “cream” it. 
  3. Set out the number of eggs you’ll need. Put them in a bowl on the counter so that one doesn’t roll off and splat on the floor.
  4. Measure out the “wet” ingredients in a cup. It’s usually milk or buttermilk, occasionally water. 
  5. Go to bed and get a good night’s rest. Your ingredients are adjusting to room temperature in preparation for their willing sacrifice to your palate.

Show Time!

The above part of the  preparation was the Zen part of cake-baking, but when it’s time to put it all together you need to get on with it. Making a cake is an exercise in chemistry and once you start the next part of the process you need to move faster.

  1. Grease the pan(s) and turn on the oven, usually to 350º.
  2. Cream the butter. That means beat the heck out of it with an electric hand mixer (my tool of choice), full-sized mixer or wooden spoon. Using a spoon takes a lot of time and considerable arm strength, but I’ve done it. You’re getting the butter soft and incorporating air into it.
  3. Add the sugar a little at a time (about 4 different additions) to the butter and keep beating it. You’re fluffing it up some more. 
  4. Add the eggs, one at a time, and beat after each addition. If the recipe calls for vanilla or some other extract I add it somewhere along in here.

Actually, you don’t have to hurry this creaming part. And this is the last time you’re allowed to “beat” anything vigorously. The reason is this: you don’t want your cakes to be tough. When you bake bread you knead the dough for a long time. This heavy treatment develops the gluten in the flour and that’s what gives bread it’s chewiness. It also helps to develop those good-sized holes. 

Cakes are meant to be tender and you want to treat the addition of the flour mixture more carefully because you don’t want to develop the gluten.

You now have five additions to make to your creamed mixture. After each one you will stir/beat the ingredients just until they’re incorporated (i.e. you can’t see any more powdery stuff or loose liquid). They are:

  1. 1/3 of the dry ingredients
  2. 1/2 of the liquid ingredients
  3. 1/3 of the dry ingredients
  4. 1/2 (the rest of) the liquid
  5. 1/3 (the rest of) the dry ingredients

You don’t have to measure these exactly. Just eyeball them. And because now you’ve combined the baking powder and or baking soda with the liquid which often is acidic, you have a chemical reaction going on. The bubbles are starting to form and you want to get it in the oven soon.

Your last addition is any nuts, raisins or chocolate chips or other tasty morsels. Fold them in gently, trying to get them pretty evenly distributed but precision is not necessary for deliciousness.

Put the batter in the pan(s) and place the pan(s) in the oven and don’t you dare open that oven until more than half of suggested baking time has elapsed or even longer. Otherwise your cake might “fall.”

A few more miscellaneous details . . .

  1. Don’t do the jig in front of the oven or drop heavy things on it or jiggle the cake while it’s baking. Otherwise, your cake might fall (see above).
  2. When making a cake, measure your ingredients carefully. This is probably the only circumstance in which I do this because it’s chemistry (and alchemy but we won’t go there).
  3. If I use a 13″ x 9″ pan and I’m going to leave the cake in the pan after it’s cooled and cut the pieces out of there, I just grease the pan. If I use a pan (or pans) and want to take the cake out after about ten minutes of cooling, I grease the pans and then line the bottom with parchment paper I’ve cut to size. Waxed paper will do.

Finally!!! Marilyn’s Chocolate Zucchini Cake

Oh so moist. Not very sweet but definitely a heavy chocolate hit. And, of course, sinlessly good for you because of the zucchini.

Before you even turn on the oven or grease the pans, melt together in a small bowl in the microwave:
4 oz unsweetened chocolate
1/2 cup of neutral-tasting oil like canola
Be careful. Do it in one minute intervals and stir it in between them. The oil heats up quickly and the chocolate squares will continue to melt as you stir. You don’t want to scorch it. You will add this to the creamed ingredients after all the eggs are beaten in. Let this cool down before you add it to the fat ingredients because you do not want to melt your butter or cook your eggs!

The dry stuff:
1 Cup flour
1/3 C unsweetened cocoa (Droste or Equal Exchange Organic are good brands. Ixnay on the most common grocery store brand. It’s bitter and tastes burnt to me . . . chemical processing . . . not so tasty.)
2 t baking soda
2 t baking powder
1 t salt

The wet stuff:
1/3 C buttermilk or sour cream (if you don’t have them on hand you can use regular milk (any % fat or nonfat) with a teaspoon of lemon juice or vinegar added to it)

The cream together stuff:
1/2 C butter
2 C sugar (regular granulated, use something that says it’s pure cane sugar. There are issues with adulteration that you want to avoid.)
3 eggs
1 T vanilla

Add at the end fold in:
3 C grated zucchini or summer squash
1/2 to 1 C chopped walnuts

This is thicker than most cake batters but don’t worry.

Easiest is to bake in a 13″ x 9″ pan for about an hour or until it tests “done.” That’s when the edges are starting to come away from the pan and when you stick a toothpick into the middle of the cake, it comes out clean. If it’s not done it will come out with sticky batter on it. If you use smaller pans, like two 9″ round cake pans, you bake it for less time, like 40 minutes or so.

When it’s cool frost with Cream Cheese Frosting  or any other favorite of yours.

Cream together 8 oz cream cheese and ½ cup soft butter (I prefer unsalted).  Add 2 t of vanilla. Slowly add about 4 cups of confectioner’s sugar, beating with an electric mixer after each addition. (I usually don’t measure. Just keep adding sugar until it’s the right consistency and taste.)

A Disclaimer

Except for eighth grade Home Economics with Mrs. Blair I never studied cooking in a school. Instead, I learned to prepare food from a gaggle of mentors (mostly Ma, Grandma and Great Aunt Shirley) and by doing it. So be forewarned. I may not explain things in the “right” way, but

  1. I make food that people like to eat. Lots of it. Lots of them. 
  2. No one has ever gotten sick from eating something from my kitchen. At least they haven’t told me about it if they have. Or maybe they haven’t lived to tell about it, but it’s likely I would have noticed their obituaries.

Yogurt and Garlic Pasta

I took a 5-day  gallivanting road trip a couple of weeks ago to play with old friends and knitting.

Before I left  I cleaned out the refrigerator. The day after I got home I needed to hustle up a pot-luck dish to take to Blessings and I’m tired of driving so I looked at what I had on hand. This is a major theme in my food world. I ALMOST NEVER, EVER, SHOP FOR THE INGREDIENTS FOR A RECIPE. Instead, I keep things around that I know I like and ‘cook’ from those. I shop my cupboards far more often than shopping at the store. This saves me time and money, especially because when I cruise the grocery store I buy what’s on sale if it’s one of my staples.

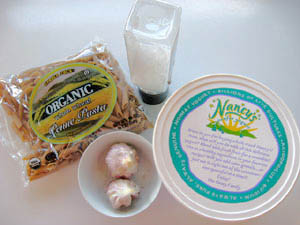
I found four things I almost always have in the larder:

Yogurt Garlic Pasta 1

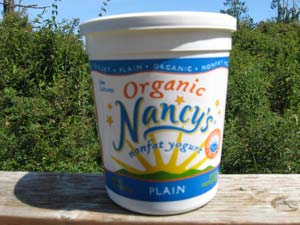
yogurt, salt, garlic, and pasta. The pasta is Trader Joe’s Organic Whole Wheat Penne, but you can use any type. The yogurt is plain Nancy’s Nonfat. Plain is important.

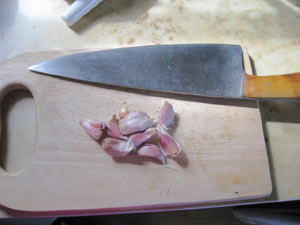
Next I got out my mortar and pestle and pulled some cloves from the garlic. A lot of cloves.

IMG_0864

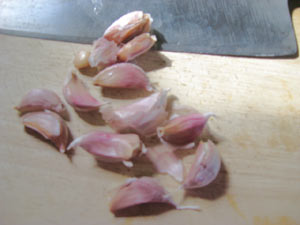
In my neighborhood garlic is planted in late fall and harvested mid-summer. That means that by late spring, most garlic has lost some of its flavor, and is softish. This garlic is a freshly harvested, very pungent rojo (red) variety. Small cloves but full of oil and hot stuff. Perfect for this dish.

Lay them on the cutting board along with your biggest and heaviest knife. Mine was hand made from an old saw blade and its blade is 8.5″ long. Yogurt Garlic Pasta 3I lay it flat in on top of the garlic cloves and give the blade a thwack or two with base of my palm. This breaks the outer skins and makes the cloves easy to peel.Yogurt Garlic Pasta 4

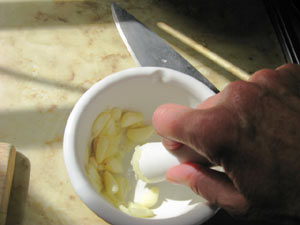
My mortar and pestle are not perfect for this job. They’re unglazed porcelain. They don’t have much bite for grinding anything other than dried herbs, but I use them anyway because they are what I have. I add the garlic cloves and some coarse sea salt and grind the heck out of them.

Yogurt Garlic Pasta 5

Now is the point at which enquiring minds will ask, “Why is she grinding the garlic rather than chopping or mincing it? ” And the answer is I want to smash the oil out of it, which gives it a stronger flavor. That and the oil mixes readily with the yogurt. You could also use a garlic press which crushes the cloves. You could also use a wooden spoon in a bowl, two wooden spoons nestled together, two forks and a plate . . . invent a technique using the tools you have on hand. I use this technique because this is how I learned it from a Greek lady.

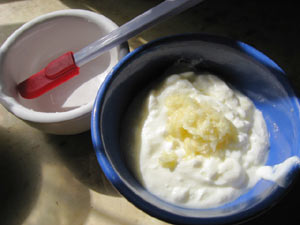
Next, I put a large dollop of yogurt into a bowl, about a cup-and-a-half to two cups, [here’s another theme: I SELDOM MEASURE INGREDIENTS] and add the garlic-salt mixture:Yogurt-Garlic-Pasta-7Then mix it all together with a fork or spoon or rubber spatula (or I suppose you could use your finger but it would be messy).

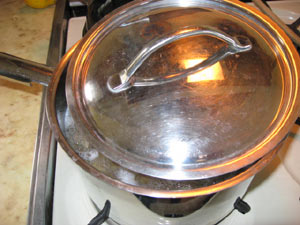
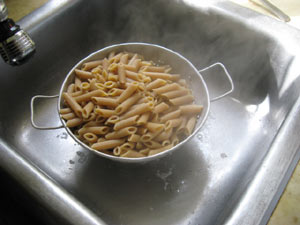
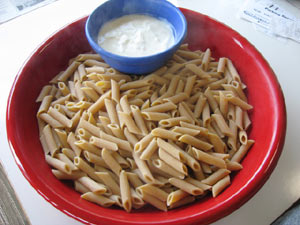
Next, cook your pasta per instructions on the package except you don’t need as much water as they say. I cooked the whole pound in my four liter pot a little over half-filled with water. That’s just over half the water they call for. Just pay attention and keep the lid ajar.Yogurt-Garlic-Pasta-8Now if I had had company here for dinner, the table would have been set, the lettuces salad made but not dressed until the last minute, and I would have combined the pasta with the yogurt sauce and served it. It would be time to eat immediately after the pasta was drained.Yogurt-Garlic-Pasta-8.5

As it was, I was going to a pot luck and a Blessings sister had called an hour earlier to sing ‘Happy Birthday’ and she told me she was bringing fresh basil pesto. We decided it would be nice on the pasta as well, so I dished it out like this:Yogurt-Garlic-Pasta-9

I had to drive about 20 minutes and we ate another half-hour after that but I didn’t worry. This dish does fine at room temperature.

LEARNING OPPORTUNITIES:

  1. Unless the Fourth Hungarian Regiment is coming for dinner, don’t cook a whole pound of penne. It makes A LOT. I made 3 to 4 times more pasta than we ate. There was a pasta salad there (which doesn’t happen too often. We never plan who’s bringing what. We all just make what we feel like making that day) and lots of other goodies including a to-die-for-from-scratch-chocolate-birthday-cake. Even after I gave away some of it, I brought over a quart home.
  2. Don’t mix the sauce with the pasta until you’re ready to serve it, otherwise it gets absorbed by the pasta which becomes bloated (i.e. no longer al dente) and starchy. Eeewwww.  I learned this years ago but it’s relevant here.
  3. Can you freeze cooked pasta? None of us knew so I came home and promptly put a quart of it into a yogurt container and popped it into the freezer. I’ll let you know the results when I take it out.
  4. This sauce, with much less yogurt, is great medicine for a sinus infection or cold. It’s hotter than heck but safer for you, and for me more effective than, antibiotics. Serve it on crackers, hold your nose and dive in. Good (organic), fresh garlic is good medicine. I know this because my great-grandmother (and generations of my ancestors before her) was the village healer. Modern medical research is finally catching up.

p.s. It was a hit. I’d never taken it to Blessings before and most of the sisters loved it. A couple kept remarking that they never would have thought such an odd combination could be so good. That’s only because they haven’t hung out with the right old Greek ladies.

A refreshing “slaw”

I had a quick email last night from mobim (my older brother in Michigan) asking me to send a recipe to his friend for a salad I made while I was there. This is what I sent:

Hi Pam,

My brother asked me to send you a recipe . . . I think it was the “slaw” you liked, right? I don’t have a recipe, really. It’s different every time I make it, but here is what I think went into it when I was there . . .

  • a small red and a small white cabbage, thinly sliced
  • a sweet onion (a red one or a Walla Walla or Bermuda or Vidalia will do) quartered and very thinly sliced (maybe just half of this onion depending on how much it bites back when you bite into a little piece)
  • grated carrots
  • I love to add very thinly sliced red, orange, yellow or green bell pepper or a little of each color but I didn’t that night because John’s and the girls’ digestions are disturbed by it.
  • I usually use jicama instead of white cabbage when I’m home. It’s readily available here.
  • about 1/4 cup to 1/2 cup of chopped cilantro depending on how big your pile of veggies. 

I thinly slice, julienne these all into a large container . . . then I make the dressing which is a vinaigrette type.  Because I don’t measure, I have to guess, but these are approximate proportions and amounts:

  •  1/2 cup of oil, extra virgin olive mostly, with a little canola or other flavorless type
  • 1/4 to 1/3 cup fresh lime juice and rice vinegar, mixed . . . I think I used 2 limes that night and made up the rest with the vinegar
  • a couple teaspoons of honey or sugar (natural is best)
  • salt and pepper
  • a little cayenne (very little if you’re serving the Brunettes)

Whisk the dressing ingredients together. Pour over the veggies. Toss to coat. Let sit for a few hours in the fridge (or longer) before serving.

Hope this is what you were looking for. If not, write me.

Cheryl

Cabbage is readily available year round, keeps well and makes a good slaw-type salad. It’s a “semi-dense” salad and especially refreshing in hot weather and the warmish weather which is about as hot as we get on the island. 

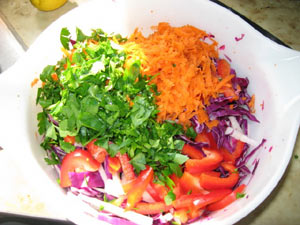
Here’s one I made recently at home. Cabbage is the base, but whatever “dense veggies” I have on hand can go into it. In this case here are the ingredients sliced and grated to appropriate size:

slaw-ingredients

There is julienned jicama, thinly sliced red cabbage and red bell pepper, grated carrot, chopped cilantro, and chopped scallions/green onions. I happen to love cilantro but not everyone does. You can use parsley instead which is more commonly used in middle and northern European cooking. However, I really do think that the addition of a freshly chopped herb elevates the dish from “cole slaw” to something better.

Notice the combination of colors. Beautiful, no? Beauty is important. 

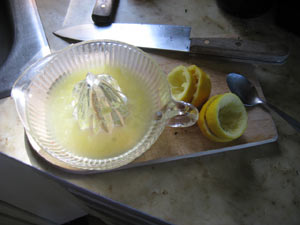
Then I made the dressing. I generally prefer lime juice for  the “slaw” that has cilantro and jicama, but I had only lemons in the fridge. I juiced two lemons with my mother’s old glass juicer . . .

juicelemons

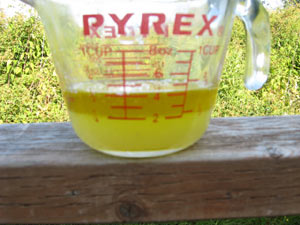
Put the juice into a liquid measuring cup with some good, extra virgin olive oil . . .

lemonvinaigrette

Usually you use about twice as much olive oil as acid (lemon or lime juice or vinegar) but I’m a few pounds up and cheating on the not so much oil side these days.

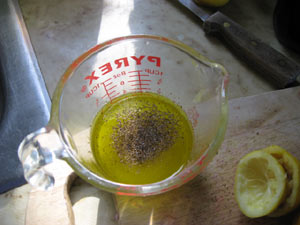
Add salt and pepper to this mixture . . .

S&P-in-vinaigrette


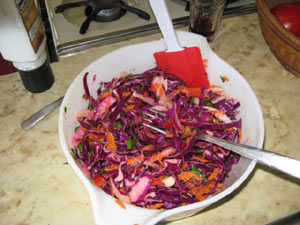
Stir this dressing with a fork . . . be energetic about it . . . then pour it over the veggies and toss them all together so that the veggie pieces are coated with the dressing . . .

mixredslaw

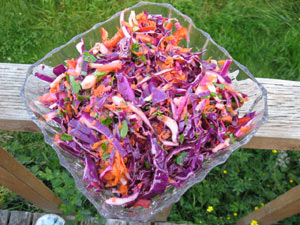
Let the dressing and vegetables mingle for a few hours before serving. And when you do serve the salad, turn it out into a pretty dish . . .

serveredslaw

Beauty counts.

That and it’s delicious.

Yogurt cheese dressing instead of mayo

I seriously love fat. Not all types, but I’ve told my son that if I don’t get cremated I want to be embalmed in Challenge Unsalted Butter. I’m not sure it would work but I’d finally get my fill of it.

However, I don’t have as much muscle mass as I used to and I don’t always get as much exercise as I would like so I try not to have too much fat every day. One tablespoon of good, real mayo has 110 calories, of which 110 are fat. I love it and eat it but I often use something lighter when I’m dressing a dense salad. My favorite is nonfat yogurt cheese.

Nonfat yogurt cheese?!??

Yogurt is fermented milk. You take some milk from a goat, cow, camel, sheep, yak, whatever you’re milking that day, introduce some bacteria into it, keep it warm so they can multiply and bingo! In a few hours you’ve got yogurt.

Now that may sound gross to those of you who think that food grows in plastic containers, but if you stick around this blog long enough, you’ll toughen up. I was skinning rabbits with my grandpa when I was five and I raised beef cattle for 10 years. I’m not queasy when it comes to looking at real food sources.

There’s evidence that yogurt has been around for a long time. We can track it back about 12,000 years, and it makes good sense. Think about it. You milk the musk ox, leave the milk in a bowl near the hearth, bacteria floating by decide it’s an inviting place to land and the result is thick, tangy and delicious and it lasts a while. Refrigerated, it lasts a long time and it stays alive. Yogurt is a live food! This is a good thing.

Most of what’s sold in the U.S. as yogurt really just starts with yogurt. Then a whole lot of stuff is added to it: sugar, gelatin, high fructose corn syrup, fruit jams, pectin, pretend flavors, etc. Some of these “yogurt food products” have been heated in their processing in a way that kills the good bacteria. This is a bad thing. It’s not even honest to call them yogurt, but honesty is not a hallmark of the corporate food industry and, once again, I digress  . . .

You can buy yogurt with the same fat contents as milk. Whole milk or yogurt is 4% fat content. Then there’s 2%, 1%, and nonfat. Nonfat organic yogurt is a staple at my house.

It can be gussied up a number of sweet and savory ways and is nutritious and satisfying. Oh . . . and one cup equals 120 calories. That makes it 15 times less fattening than mayo.

About this yogurt cheese thing? 

1. Start with good, real yogurt. 

YogurtCheese_1

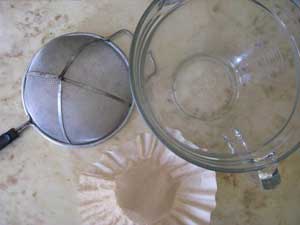
2. Get out your tools: a strainer, coffee filter, and tall bowl.

YogurtCheese_2

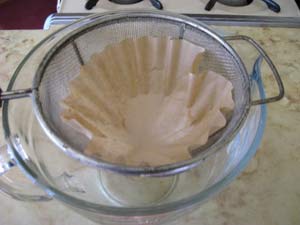
3. Nest the tools so:

YogurtCheese_3

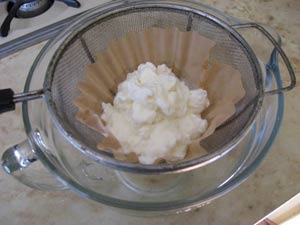
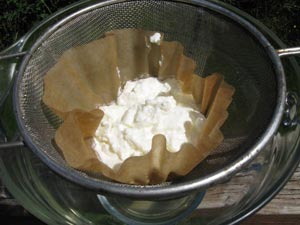
4. Add a cup or two of yogurt.

YogurtCheese_4

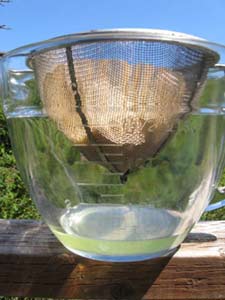
5. Let it drain a few hours or overnight. The longer it drains the thicker it gets.

YogurtCheese_5

This has drained for about six hours.

YogurtCheese_6

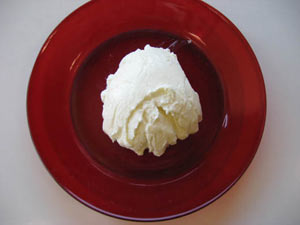
When I turn it out on a plate you can see it’s more solid than regular yogurt.

YogurtCheese_7

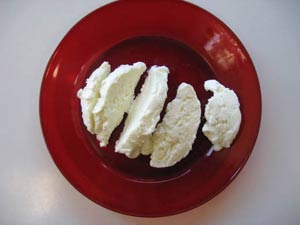
I can even slice it.

YogurtCheese_8

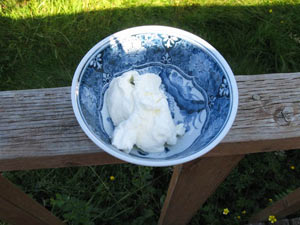
6. Put it into a clean bowl.

YogurtCheese_9

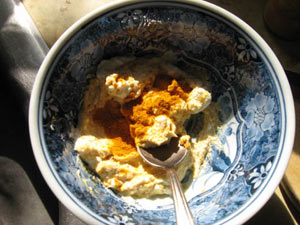
7. Add some curry powder.

YogurtCheese_10

8. Mix well.

YogurtCheese_11

And voila! You have the dressing for your chicken salad.

Dense salads continued . . .

 A pithy review of the last post

Dense salads . . .

  1. consist of small pieces of real food plus a dressing (also real food).
  2. are easy. It’s hard to “make a mistake” while preparing them.
  3. are good “fast food” because they keep in the fridge a few days and we can nosh on them any time. They help keep us out of the cheesecake and chocolate (mostly).
  4. are good for you. You make them out of REAL FOOD.
  5. are infinitely (or close to it) variable so you don’t have to get bored eating them.
  6. can be very economical.
  7. Commercially prepared dense salads (like those in plastic containers or the big grocery chain deli) may have chemicals in them. Yuck! Chemicals taste bad and they are not a food group.
  8. You learned how to make Basic Chicken Salad. If there’s anything you didn’t understand, or any steps you don’t know how to do, write me a comment and I’ll clarify it for you.

I know I didn’t say all those things in exactly those words, but those were the explicit and implicit lessons.

Basic Chicken Salad dressed up to impress the neighbors 

Michelle commented yesterday “Sounds like my “Instant Karma” chicken salad. I add some curry and raisins instead of apples. It’s addicting and good for your soul!” I love that name. She anticipated today’s post . . .

Curried Chicken Salad

“Curry” refers to a savory sauce seasoned with the  yellow powder we associate with sitar music and aging hippies. We aren’t going to make a sauce but we are going to use the powder.

It’s not a spice but a mixture of ground herbs and spices. There are probably as many combinations as there are Indian grandmothers but they all contain turmeric which gives them that yellow color. Other ingredients may include a bunch of C-words—cardamon, coriander, cumin, cayenne, cinnamon, dried chilis—and maybe some ginger and fennel and mustard seeds. You can grind your own but I get it in small amounts from The Food Co-op bulk spices and herbs area though you can buy it at any grocery store. It can be mild or pack a lot of heat. I suggest you buy mild and add cayenne if you want it hotter.

To make “Curried Chicken Salad” follow the basic salad procedure except add some raisins like Michelle, or I like Craisins (sweetened dried cranberries) because I love the dark red with the bright yellow dressing. I usually add coarsely chopped almonds or pecans, and I leave in the apple (if I have one on hand).

Add some of the curry powder (a spoonful or two) to your mayo, blend it well, scrape it into the bowl with the small food chunks and toss the whole thing. By that I mean toss the ingredients in the bowl until everything is covered more or less evenly. Use a couple of forks or a spoon and fork. You want it sort of “fluffed up.” (I know, how can a dense salad be fluffy? The ingredients are dense, the salad is lightly combined. Don’t push all the air out of to stuff it into a container, for example.)

If you present this in a pretty bowl lined with lettuce leaves your neighbors at the annual close-off-the-street-potluck will be so impressed that they’ll smile and wave every time they see you for the rest of the year.

On second thought, it may not fly in some neighborhoods, but it’s very pretty nonetheless and when it comes to food . . .  beauty counts.
Opportunistic eating #1: dense salads-chicken

Opportunistic Eating (Noshing)

Unless I’m with friends or family I seldom eat “a meal.” Instead, I nosh. That’s a Yiddish word for grazing or grabbing a snack like a bowl of soup or a chunk of chocolate (organic dark).

When I feel a hunger tug I do not want to wash lettuce, spin it dry, tear it up, chop accompanying veggies, make the vinaigrette, etc. I just want to eat and I’ll go for the chocolate every time unless I have cheesecake in the house. In other words, when it comes to food I’m like a Beluga whale, an opportunistic feeder. I eat almost any real food and will choose the most available thing that I can find at the moment.

And because I want to stay healthy and keep my weight reasonable, I’ve devised strategies to keep me out of the cheesecake (which is about the easiest thing in the world to nosh. You just go after it with a fork.) In cold weather I make big pots of soupstews (thick, savory, creative pots o’ goodness.) In warm weather I make big bowls of “dense salads.” I keep them in the fridge, front and center.

Introducing “The Dense Salad”

A dense salad is a mixture of  veggies, meat, fish, grains, fruit, pasta, cheese, legumes, hard-boiled eggs, all cut into small pieces and tied together with a “dressing.” You don’t put all those things into one salad. You just pick a few things that go well together and dress them properly.

Go to the deli department of the supermarket and you’ll see many combos. They’re pricey and the dressings are “prepared,” meaning I can taste chemicals and weird non-real-food aftertastes. So today we have our first lesson on dense salads . . . .

Your Basic Chicken Salad

Chicken breasts are widely available. They’re not very flavorful which makes them a perfect choice for salad. The boneless, skinless kind are the most expensive, but probably the easiest to try if you feel unsure about setting out on this adventure. If you’re willing to pick over the meat to remove the bones and skin, you can save money.

Get out a wide, flat saucepan or fry pan with a cover. Rinse the chicken breasts and put them in it with about 1/4 inch of water. Cover, turn the heat on and bring to a boil. When it gets there (it depends on your heat source for the time so you need to pay attention. When you have constant big bubbles and lots of steam, that’s a boil) turn the heat way down. After a couple of minutes it will settle into a gentler bubbling called a simmer. Simmer for about 15 minutes.

You can insert meat thermometers (160 degrees) and all that to see if your food is safe to eat but just use common sense. Does it look like “cooked chicken” all the way through? If you can see any transparency or red or blood when you cut into it, simmer some more. Don’t simmer it for hours or it will be as tough as an old fighting cock, though even that doesn’t matter much when you’re making a salad.

What to do once the chicken is cooked

Cool it. The chicken, I mean. Remove it from the pan and put it into a bowl. Put the bowl in the fridge after you cover it with plastic wrap or a big plate.

While it’s cooling let’s see what you have in the larder that goes with it. Celery and onion are the most important. They both keep a long time so I always have them on hand. The only caveat is that the onion needs to be sweet or light. That would be “green onions” or scallions which are short lived, red onions which last longer but have more bite, or one of the “sweets,” Vidalia, Walla Walla, Burmuda or some others I don’t know.

Wash and chop up some celery and put it in a big bowl. Glass or ceramic is best. Chop up some onion and add it to the celery.

I know I haven’t given you amounts, like a cup of this and a pound of that. I learned to cook from my Grandma and Mom and other old ladies who seldom used recipes. And that’s a key to learning to feed yourself well. Pay attention to what’s in front of you not what’s on paper. So you got too much onion or it’s chopped too big . . . so what? This is not open-heart surgery. No one will die from it and next time you’ll adjust it a little to suit you better.

How to peel an onion or chop celery? Google them. There are tons of resources that already teach that. My goal is not to duplicate that information but to adjust your attitude toward “cooking” and eating.

[onion addendum added in 2022: I forgot to tell you this earlier even though it’s a technique I’ve used for years.. Chop or slice your bulb onion of any sort (i.e. not scallions) and put the pieces onto a bowl. Cover in cold water and let them float around for about 15 minutes. Drain the onions well and then add to the salad. This takes some of the bite out. As I’ve gotten older I like raw onion to be a little more gentle.]

Off the soapbox and back to the bowl

Time to take out the chicken and chop it up and put it into the bowl with the celery and onions.

Other things you might add

. . . a chopped up apple, especially a green one, chopped dill or sweet pickle or cucumber.

Time for the dressing

Lot’s of choices here. The quick and dirty (and delicious) first choice is to dollop in some GOOD, REAL mayonnaise. How much? Well, you don’t want it swimming in it and you don’t want it dry. Again, use your judgment. You can’t start to trust it until you exercise it. Add some salt and pepper (that will be a whole blog entry by itself but I’m in a hurry tonight). Toss it all together and serve on a lettuce leaf or eat it out of the bowl with a fork.

I’m starting a theme here and it is always and foremost EAT REAL FOOD.